After report card writing and a horrible cold/sinus thingy...I am happy to be back to stamping. It has been awful not being able to stamp and so, with gusto, I set about stamping...and came up with a few different cards with a similar layout!

This first set I used the Animals Stories set that is FREE with a qualifying purchase. Of course Sale-A-Bration ends tomorrow so I was happy to get this stamp set for free while I could! I made a couple of baby cards, which are always handy to have around!


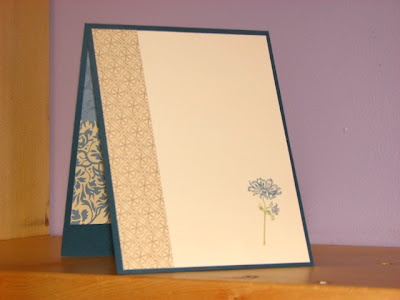
This next card I used the Charming Set which was in the Holiday Mini. It is still available for purchase and so I bought it, because I love vintage looking stamps. It is difficult to see in the photo but the Sage Shadow paper is embossed with my Texture Plates using the Big Shot. I am really pleased with how this card turned out!
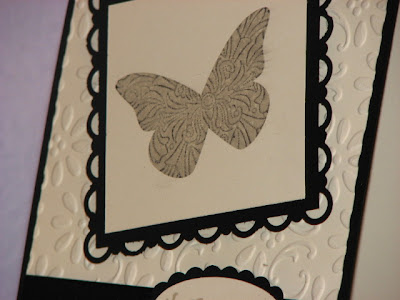
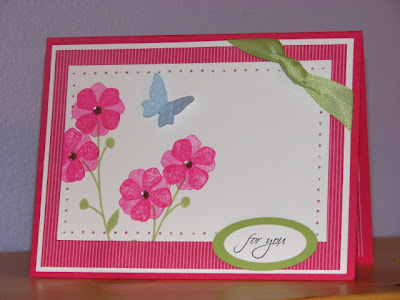
This Butterfly card was one of the cards I was going to teach at my "Kissing and Thumping" Class. I had to cancel this class because of my cold, I didn't want to get anyone else sick! I will be offering the class again mid-April.

I hope tomorrow to be able to play the Colour Throwdown and some other fun challenges out there!
Thanks for stopping by!
Smiles,
Lesley :)
 This card was made for the current Colour Throwdown Challenge to use Yoyo Yellow, Garden Green and Suede. I subbed in Kraft for Suede. I used my new favourite set and went for a minimalist card in Very Vanilla. I used my Stampin' Write Markers to colour the flower directly on the stamp. The words are stamped in Sahara. The sentiment is stamped in Stazon.
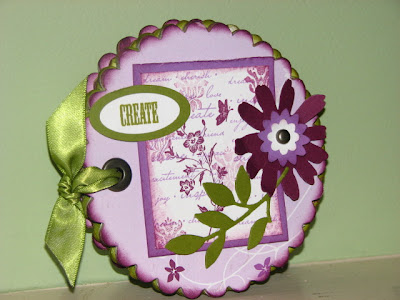 I got out the Big Shot and using the Large Scallop Circle Die, I cut four circles out of chipboard! I had never used the Big Shot for this before and let me tell you! It went through the chipboard like butter! Wow! So I then cut out 8 circles of my Cottage Wall DSP and then fit perfectly over my chipboard scalloped circles!! Tonight I would like to share the cover of my new chipboard album that I made all by myself! All the pages inside are covered with the DSP but I have not completed the inside yet. So I can only share my cover. The stamp set I used on the cover is the "Charming" set from the Holiday Mini Catalogue.
  Although it is not in any of the current catalogues, it is still available for purchase and so I got it!
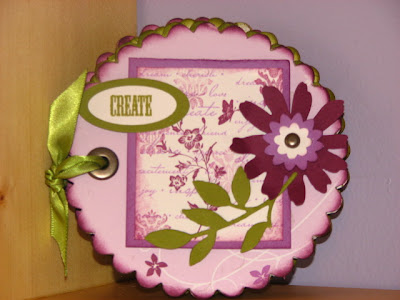 I am going to work on the inside pages this weekend and hope to share them soon.

 Here we are getting ready. I was at my parent's home and he was getting ready at the hotel with his groomsmen. Below are my bridesmaids. Left to right: Kate (my cousin, we are like sisters), Jake (my best friend of 27 years) and Christin (my dear friend of 20 years).
 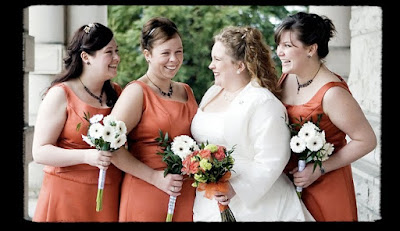 Corey's groomsmen all flew in from out of town. Left to right: Brett (from Calgary, friend of 20+ years), Davey (from Kelowna (Newfoundland originally, friend of 20+ years) and Carl (Best friend of 27 years) Both Corey and I have best friends from early childhood. It is amazing!
 Here is a picture of all the friends and family who attended our special day. We were married at St. Ann's Academy in Victoria, BC. It was the best. Corey and I did the Irish Jig down the aisle after the ceremony! Our cousin played the Irish bagpipes.
 Thank you for letting me share!
  Happy Stamping and once again, Happy St. Patty's Day!!
 This card was made for the current
  Thanks for stopping by!
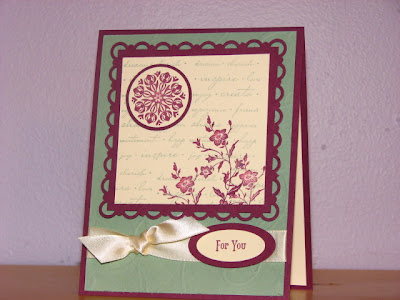
 I decided to get out one of my favourite sets called "Eastern Blooms"(111626). I bought it originally for the cherry blossom stamp but have realized that I love the other flowers that come with this set too. They stamp so well.
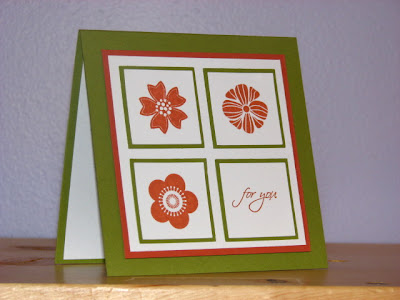
 I had some scraps in a bin and pulled out some Really Rust and some Old Olive. The cards just came together. I love the "For You" sentiment from the "All Holidays" set...such pretty scripty writing.
 Thanks for stopping by!
  I am so excited my first attempt at a Top Note Purse! I found the directions
  If any of the ladies in my group are interested in learning how to make a Top Note Purse, please leave me a comment and let me know!! Or email. :)
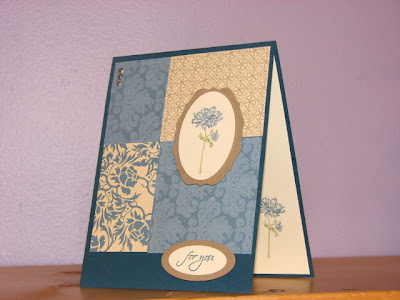
 The best thing about SU! Designer Paper is that it is 2-sided, which make coordinating cards easy! My sentiment comes from the "All Holidays" set and the flower is from "Bella's Bloom". I love this pretty little flower and used my markers to ink it up. The wide oval punch works well with this flower and I pulled out my "Lots of Tags" die with the Big Shot to created a nice little nest for the Oval Punchout. On the inside of my card, I used an extra strip of DSP I had in the scrapbox.
 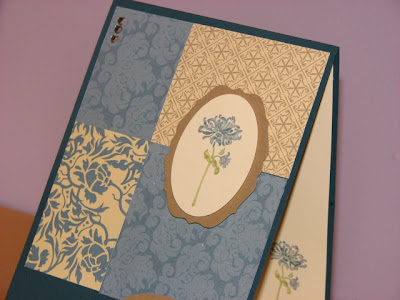 I tried to take a close-up of the flower because it is covered in glitter. I was hoping to enter this card into the Saturday Spotlight challenge, "It's So Slick!" but the glitter is not glimmering as I had hoped. I also added some little rhinetones to the top left hand corner of the card, to add some more glitz.
 ...and using the Stamp-a-ma-jig again, I stamped another flower on top of the flower I just stamped!
 Whoa! I am out of control here! LOL! And the effect was very cool...at least...I think it was!
 This tutorial is for my friend Carol. She asked me to layout the way to make a card and so I did!
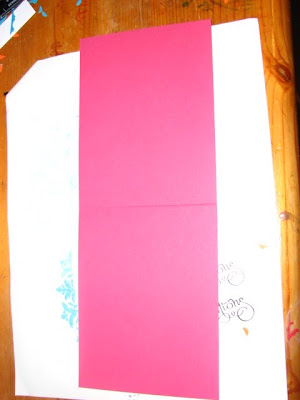 Step Two:
 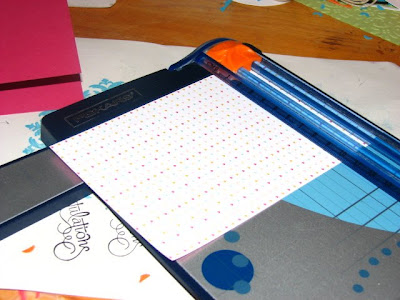 Step Four: (Excuse my messy desk)
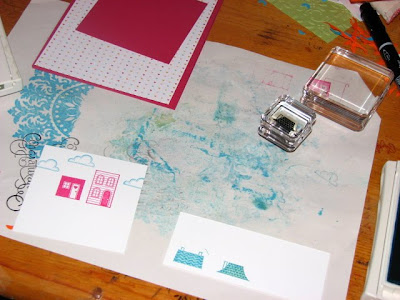
 Step Six:
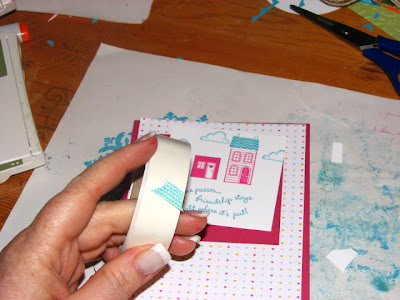
 Step Ten:
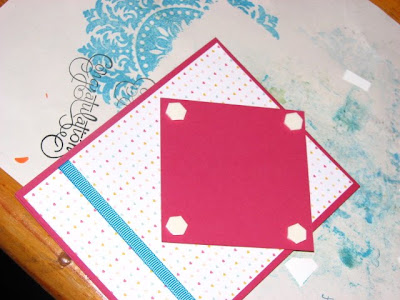

 And your card is complete. To complete the inside, just cut a piece of 4"x5 1/4" white cardstock and centre it on the inside. The sentiment I used on the front of the card is from Curvy Verses. Hope this was useful Carol! I know you have this paper and stamp set. You can use any designer series paper and then match it to the cardstock and ribbon.


